A friend of mine has a mid 70s Classic D10.
I've been going over it and fine tuning some things.
The E neck changer is pretty clean, and the pedals move easily and smoothly.
The back neck has pretty standard C6 set up, but the pedals are really stiff.
I took the back apron off and checked the motion of the cross rods and there is no sticking or problematic resistance there. There's a lot of darkening on the surface of that C6 changer that is probably rust and residue from arm sweat and shirt sleeve fibres. I believe the changer on that neck needs cleaning and oiling.
I am not clear on the procedure for removing a changer from these guitars and would appreciate any guidance.
That said, perhaps there is a simpler way to get that changer moving more smoothly... Maybe a healthy amount of triflow applied externally?
Thanks in advance.
Andy
Removing changer from MSA Classic?
Moderator: Dave Mudgett
-
Andrew Frost

- Posts: 726
- Joined: 12 Feb 2014 9:46 am
- Location: Toronto, Ontario
- State/Province: -
- Country: United States
-
Bobby D. Jones
- Posts: 3276
- Joined: 17 May 2010 9:27 am
- Location: West Virginia, USA
- State/Province: West Virginia
- Country: United States
Here is what may be the problem. The lube used when the changer was assembled, May have been White lithium grease. When I removed the changer from early 1970's MSA Classic. There was black goo, and a tan colored dried material hard as paint. I put it in a Ultra Sonic Cleaner, And would not budge, I had to scrape the brown junk off and use 0000 steel wool to get to bare clean metal.

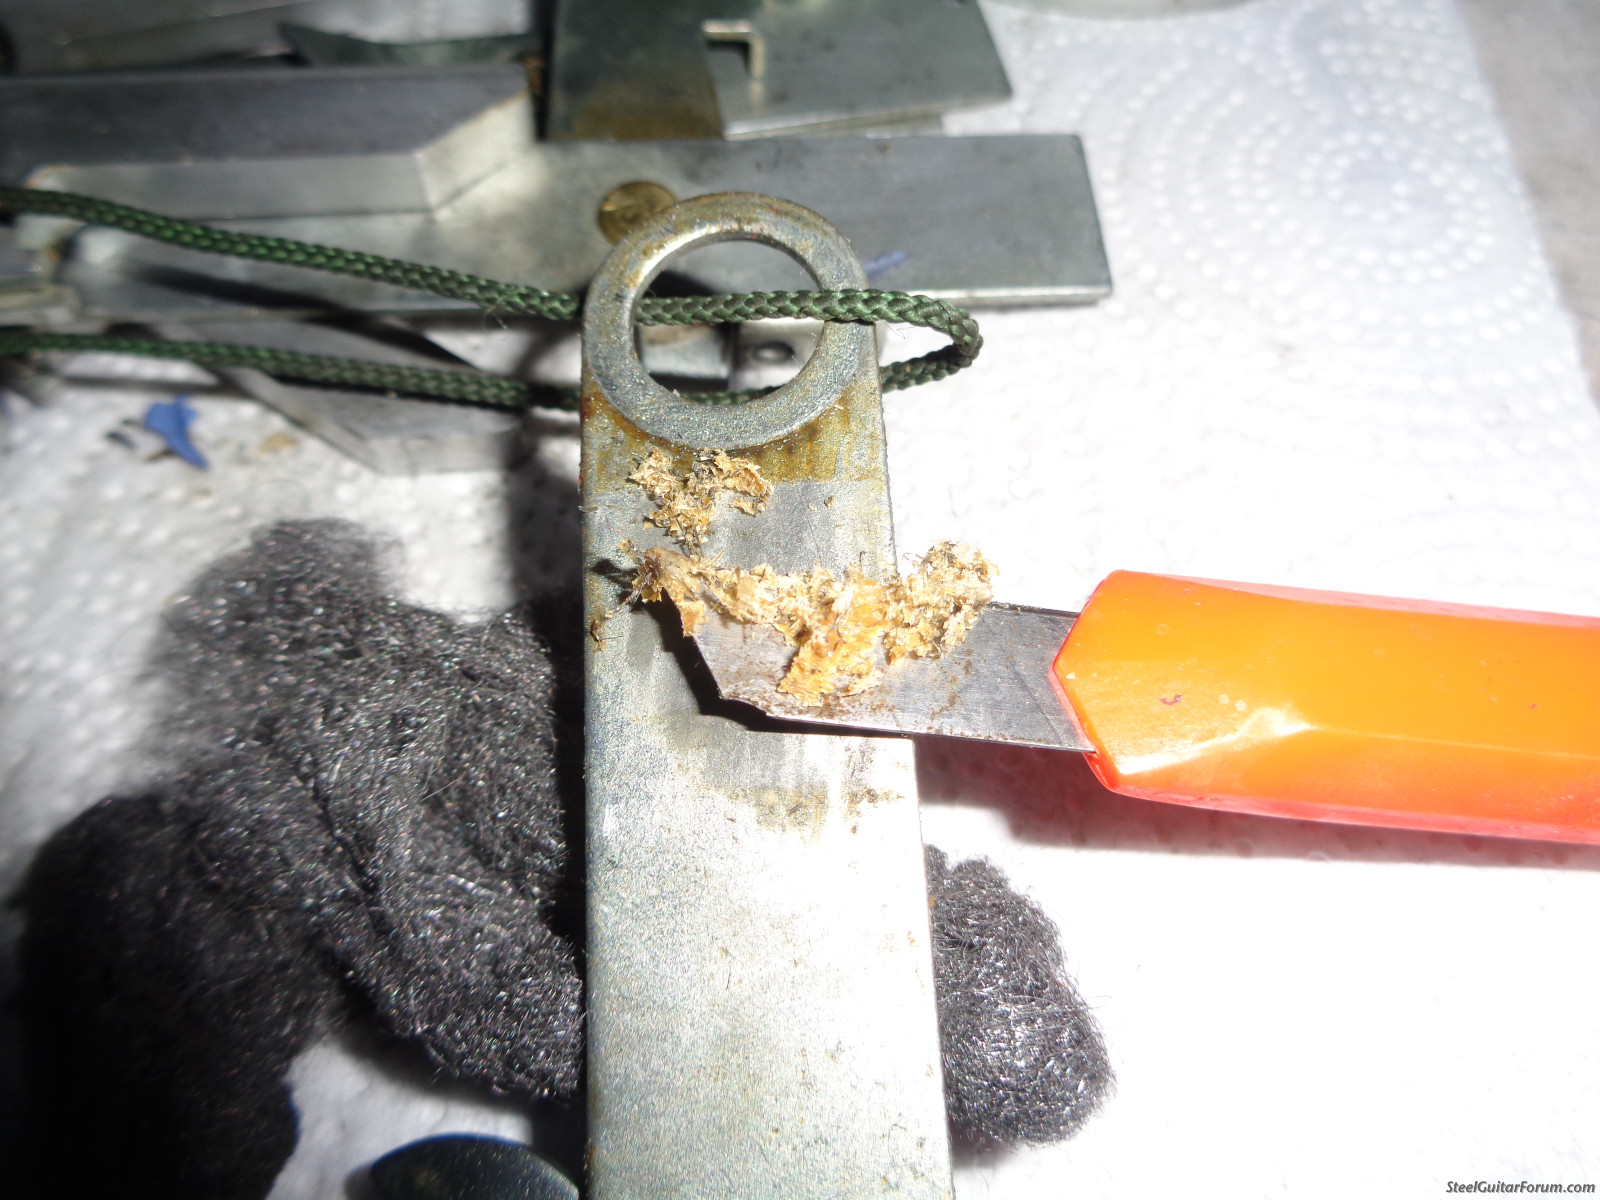
You may want to order a set of plastic spacers that goes between the changer fingers, They may have broke and came out, Or they may break from old age, When cleaning them.
The Pull rods are easy to position. Mark each pull rod with a fine magic marker, Where the pull rod exits the brass connector in the Bell Crank. Mark on each rod, With number of hole it is in the changer bars. (I used masking tape and piece on card stock.) Then Loosen the set screw in the brass ferrule on the bell crank, Remove the nylon tuning nut and aluminum sleeves, Long and short sleeve. Just slide the pull rod till it clears the changer. Move all pull rods out of changer fingers.
Make tags 1-10 and mark all Lower return springs so they go back on same string. (They have been lengthened or shortened to function on each string.)
Remove Lower Return springs and add numbered tag, To each spring.
Remove the 4 screws and remove the stop Bar/Plate. Check the Stop bar/plate for grooves, Remove groves with file, Or reverse bar on reassemble.
I suggest you cut a stout string to go through the changer fingers a spacers and allow room to work on each finger and raise and lower bars, PLACE SOMETHING, I used a key ring. So the fingers go back to the same string.
Remove the 2 screws from the changer shaft support from top of guitar.
From the under side of the guitar, Remove the 4 screws that holds the end caps on the changer shaft. Remove the changer shaft, With raise/lower levers, and fingers, And plastic spacers in order.
Check rivets on changer bars. Clean polish, Lube. Check changer shaft, Polish, May need a 1/2 turn on reassemble.
Good Luck on this project.
If you have any questions, Feel free to contact me.
-
Bobby D. Jones
- Posts: 3276
- Joined: 17 May 2010 9:27 am
- Location: West Virginia, USA
- State/Province: West Virginia
- Country: United States
-
Andrew Frost
- Posts: 726
- Joined: 12 Feb 2014 9:46 am
- Location: Toronto, Ontario
- State/Province: -
- Country: United States
-
Quentin Hickey
- Posts: 2029
- Joined: 24 Sep 2010 7:18 am
- Location: Nova Scotia, Canada
- State/Province: -
- Country: United States
-
Bobby D. Jones
- Posts: 3276
- Joined: 17 May 2010 9:27 am
- Location: West Virginia, USA
- State/Province: West Virginia
- Country: United States
I use spray can Starting Fluid for small quick cleaning jobs.
I used spray can Starting Fluid for cleaning firearms, As a police armor. For quick cleaning and inspection of weapons.
Spray parts, Use a bristle brush to clean dirty areas, Spray rinse with Starting Fluid. Dries very quickly.
USE OUTDOORS, VAPORS DANGEROUS.
Here at home, I have an Ultra Sonic Cleaner, Dawn Dish Washing Liquid, Heats to 180 degrees, And vibrates.
-
Andrew Frost
- Posts: 726
- Joined: 12 Feb 2014 9:46 am
- Location: Toronto, Ontario
- State/Province: -
- Country: United States
-
Henry Matthews

- Posts: 4072
- Joined: 7 Mar 2002 1:01 am
- Location: Texarkana, Ark USA
- State/Province: -
- Country: United States
-
Andrew Frost
- Posts: 726
- Joined: 12 Feb 2014 9:46 am
- Location: Toronto, Ontario
- State/Province: -
- Country: United States
...We got the changer out, dismantled and cleaned up.
We used tri-flow and a toothbrush, while working the scissor fingers back and forth to loosen things up..
Got it all put back together, reloaded return springs, re-rodded all the pulls and restrung the C6 neck. Substantially improved playability!
Thanks for all the input here, this forum is great resource.
Cheers
Andy
-
Bobby D. Jones
- Posts: 3276
- Joined: 17 May 2010 9:27 am
- Location: West Virginia, USA
- State/Province: West Virginia
- Country: United States
-
Dennis Detweiler

- Posts: 3973
- Joined: 8 Dec 1998 1:01 am
- Location: Solon, Iowa, US
- State/Province: Iowa
- Country: United States
I had to dismantle and clean both of my MSA U12's (1975 and 1976) a few years ago. I replaced the springs with slightly lighter ones. Complete overhauls. They play better and sound better than they every have.
1976 Birdseye U-12 MSA with Telonics 427 pickup, 1975 Birdseye U-12 MSA with Telonics X-12 pickup, Revelation preamp, Ibanez Analog Mini Delay and Hall Of Fame Reverb, Crown XLS 1002, 2- 15" Eminence Wheelhouse speakers, ShoBud Pedal, Effects Pedals. 1949 Epiphone D-8.
-
Andrew Frost
- Posts: 726
- Joined: 12 Feb 2014 9:46 am
- Location: Toronto, Ontario
- State/Province: -
- Country: United States
-
Dennis Detweiler
- Posts: 3973
- Joined: 8 Dec 1998 1:01 am
- Location: Solon, Iowa, US
- State/Province: Iowa
- Country: United States
I had to cut and remake most of the spring length to get the proper tension, but worth it in the end. Use needle nose pliers to reattach.
1976 Birdseye U-12 MSA with Telonics 427 pickup, 1975 Birdseye U-12 MSA with Telonics X-12 pickup, Revelation preamp, Ibanez Analog Mini Delay and Hall Of Fame Reverb, Crown XLS 1002, 2- 15" Eminence Wheelhouse speakers, ShoBud Pedal, Effects Pedals. 1949 Epiphone D-8.
-
Douglas Schuch

- Posts: 1504
- Joined: 10 Jun 2011 9:33 am
- Location: Valencia, Philippines
- State/Province: -
- Country: United States
Bobby - why do you want to put changer fingers back on the same string they came from? I seem to recall, when rebuilding a couple of old Sho-Buds many years ago, that James Moorehead recommended swapping any fingers that showed lots of wear with those showing less wear. Here's a quote from the instructions he sent me I just dug up to confirm what I remembered:
"It is unimportant which finger goes back into which slot, so don't worry about numbering them. What IS important, is putting the fingers that show the most wear and tear into a slot that gets the least plating traffic. So finger 4 might go back and become finger nine, and finger nine becomes the new finger 4."
So I'm curious why you think it IS important. I currently own an MSA Millennium II that I intend to break down and clean in a couple weeks. If you or anyone else is familiar with Millies, I'd be curious what differences there are between them and the older MSAs, and any hints/suggestions.
Thanks!
Bringing steel guitar to the bukid of Negros Oriental!
-
Dennis Detweiler
- Posts: 3973
- Joined: 8 Dec 1998 1:01 am
- Location: Solon, Iowa, US
- State/Province: Iowa
- Country: United States
I swapped my changer fingers around according to their wear.
1976 Birdseye U-12 MSA with Telonics 427 pickup, 1975 Birdseye U-12 MSA with Telonics X-12 pickup, Revelation preamp, Ibanez Analog Mini Delay and Hall Of Fame Reverb, Crown XLS 1002, 2- 15" Eminence Wheelhouse speakers, ShoBud Pedal, Effects Pedals. 1949 Epiphone D-8.
-
Bobby D. Jones
- Posts: 3276
- Joined: 17 May 2010 9:27 am
- Location: West Virginia, USA
- State/Province: West Virginia
- Country: United States
I went through all the fingers, Checking for wear from the lower levers, Especially 2-4-8 on E 9th neck, 10 string on C6th neck, Checked top of fingers for string groves. I would have changed any if needed, With another finger.
There is 10 fingers, 10 raise/lower levers, 11 spacer washers and 1 center support that goes in order in a MSA Classic changer. That must be in exact order.
Guess I washed to many cream separator parts, With discs that must be in order to work. And worked on to many New Departure bicycle brakes, and mining machinery clutches in my life. With inside and outside geared discs that must be in exact order to work proper.
The old Sho-Buds that had pot metal fingers in certain models, The lower lever where it contacted finger would wear slots in the bottom of the pot metal fingers. And cause major problems.